Mol* Tutorial
Note
This cheat sheet, with edits, is from the complete Mol* documentation.
General Interface
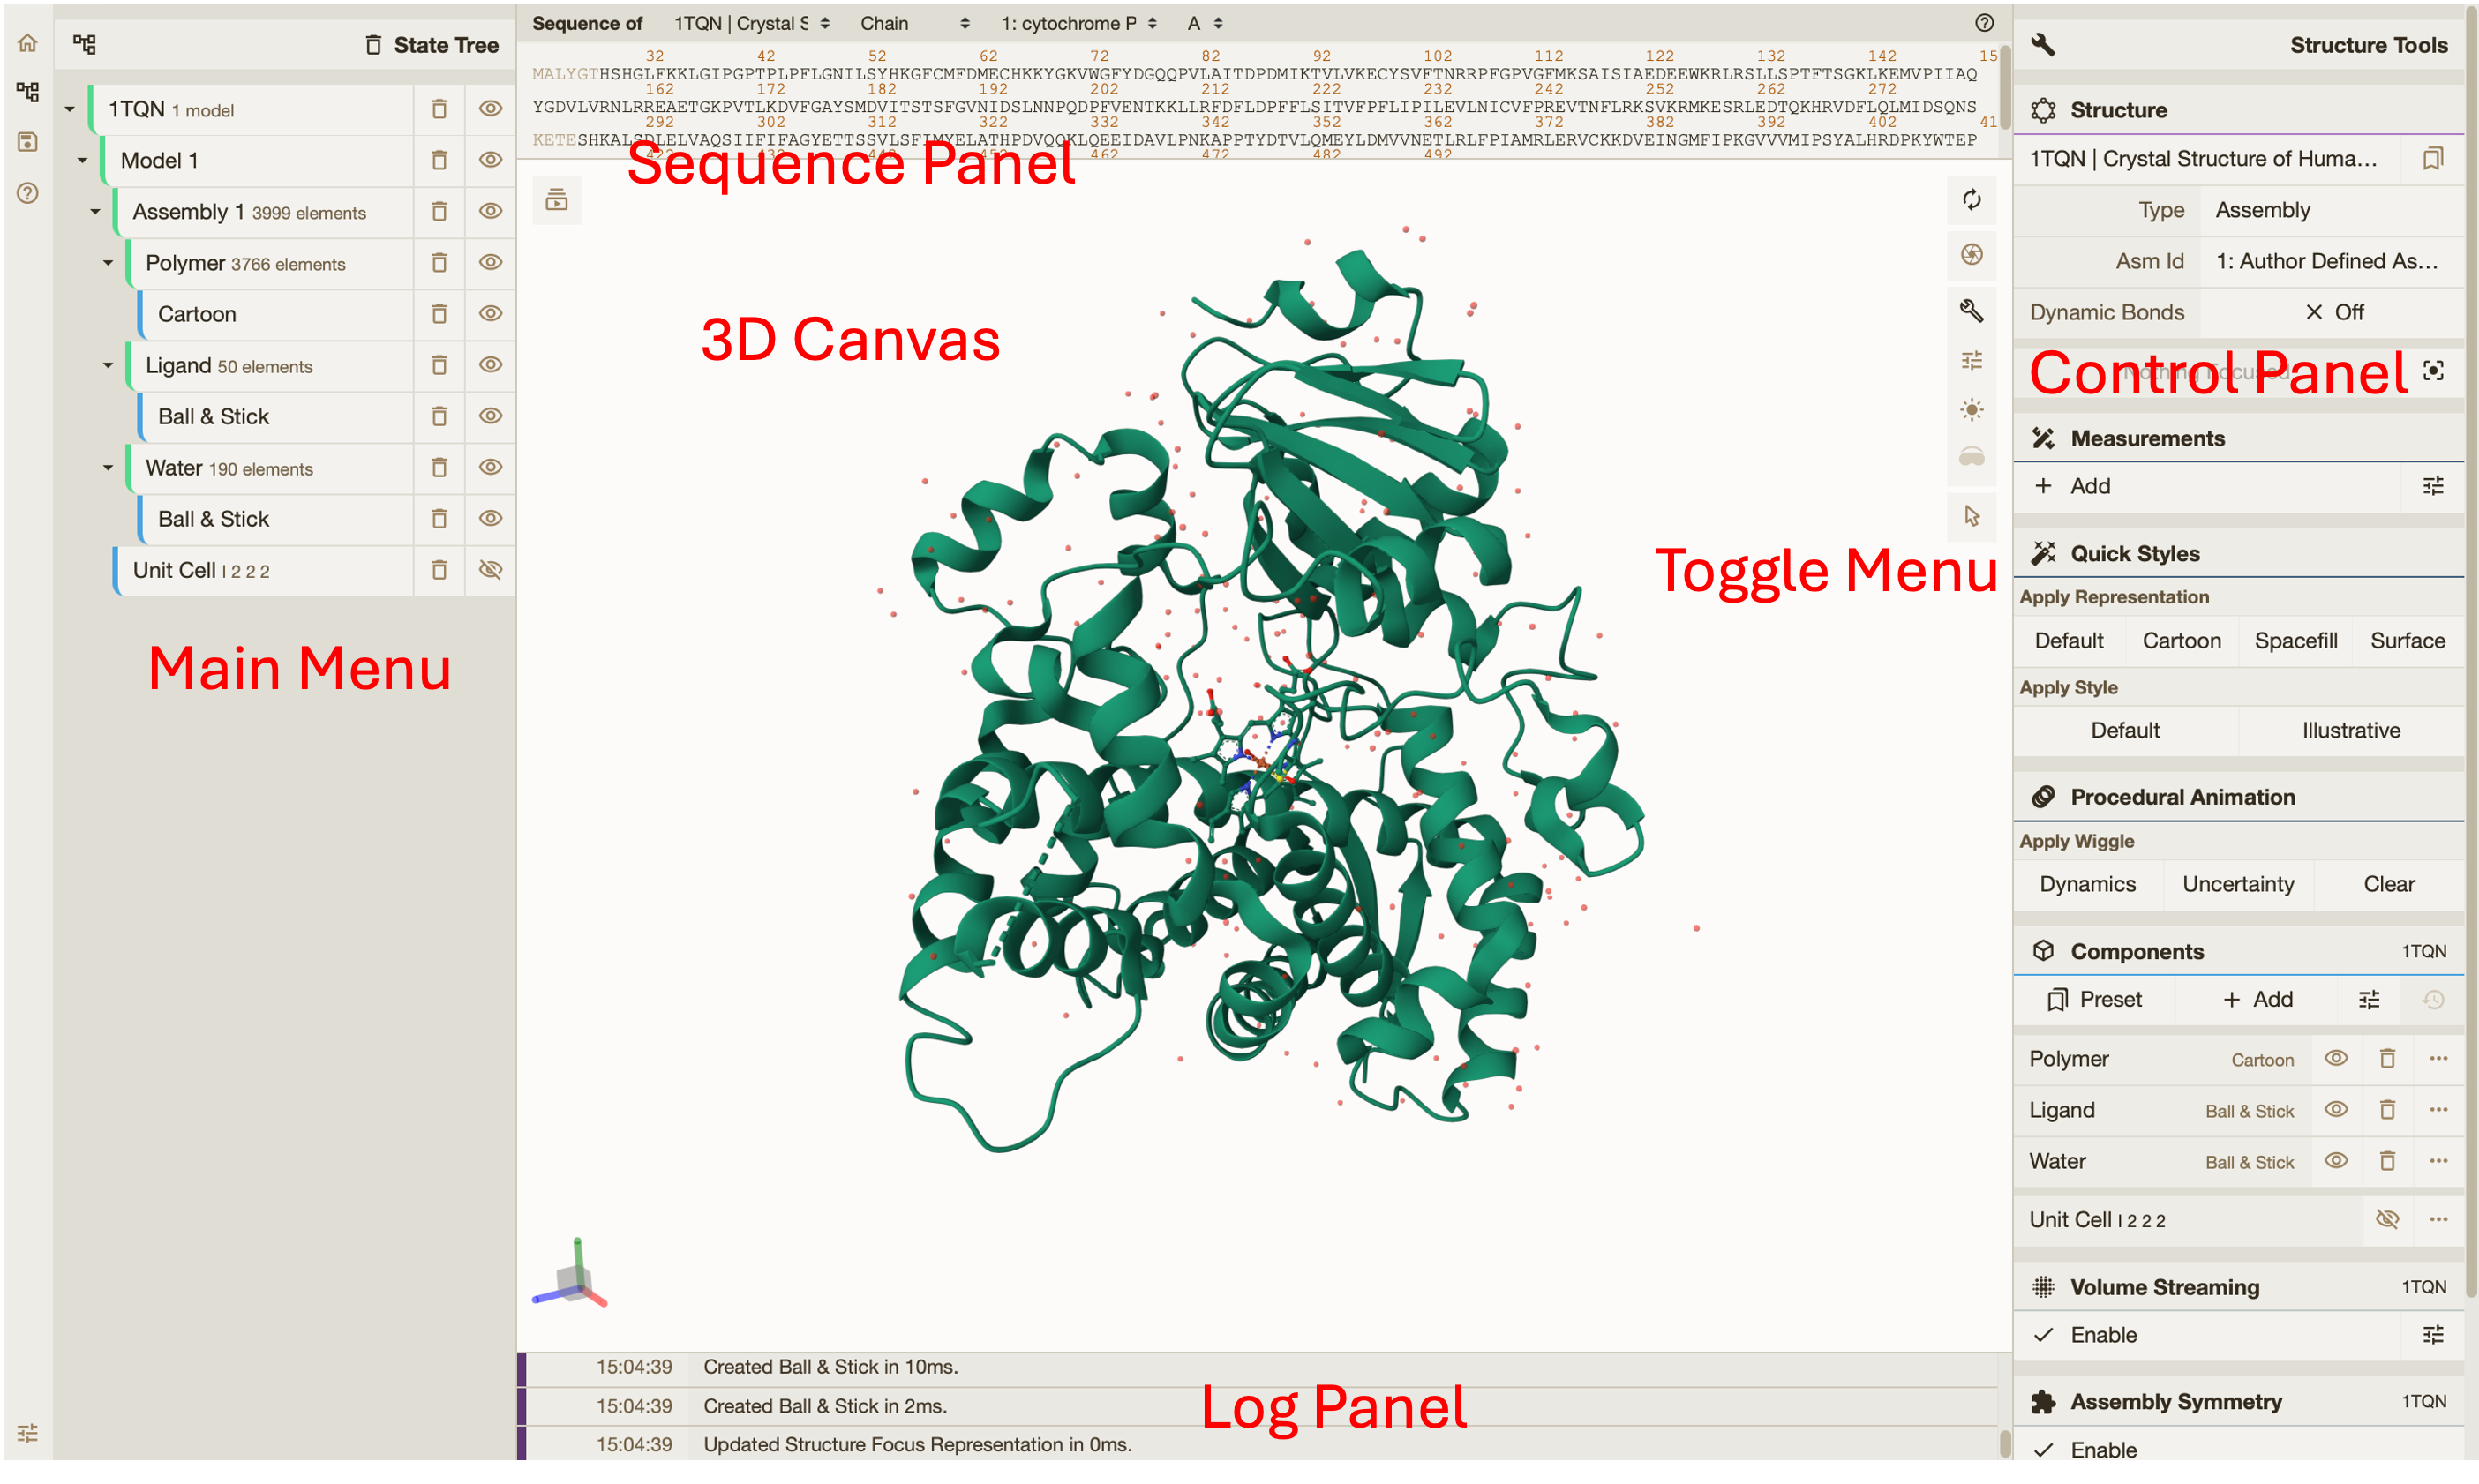
Navigate the 3D Canvas
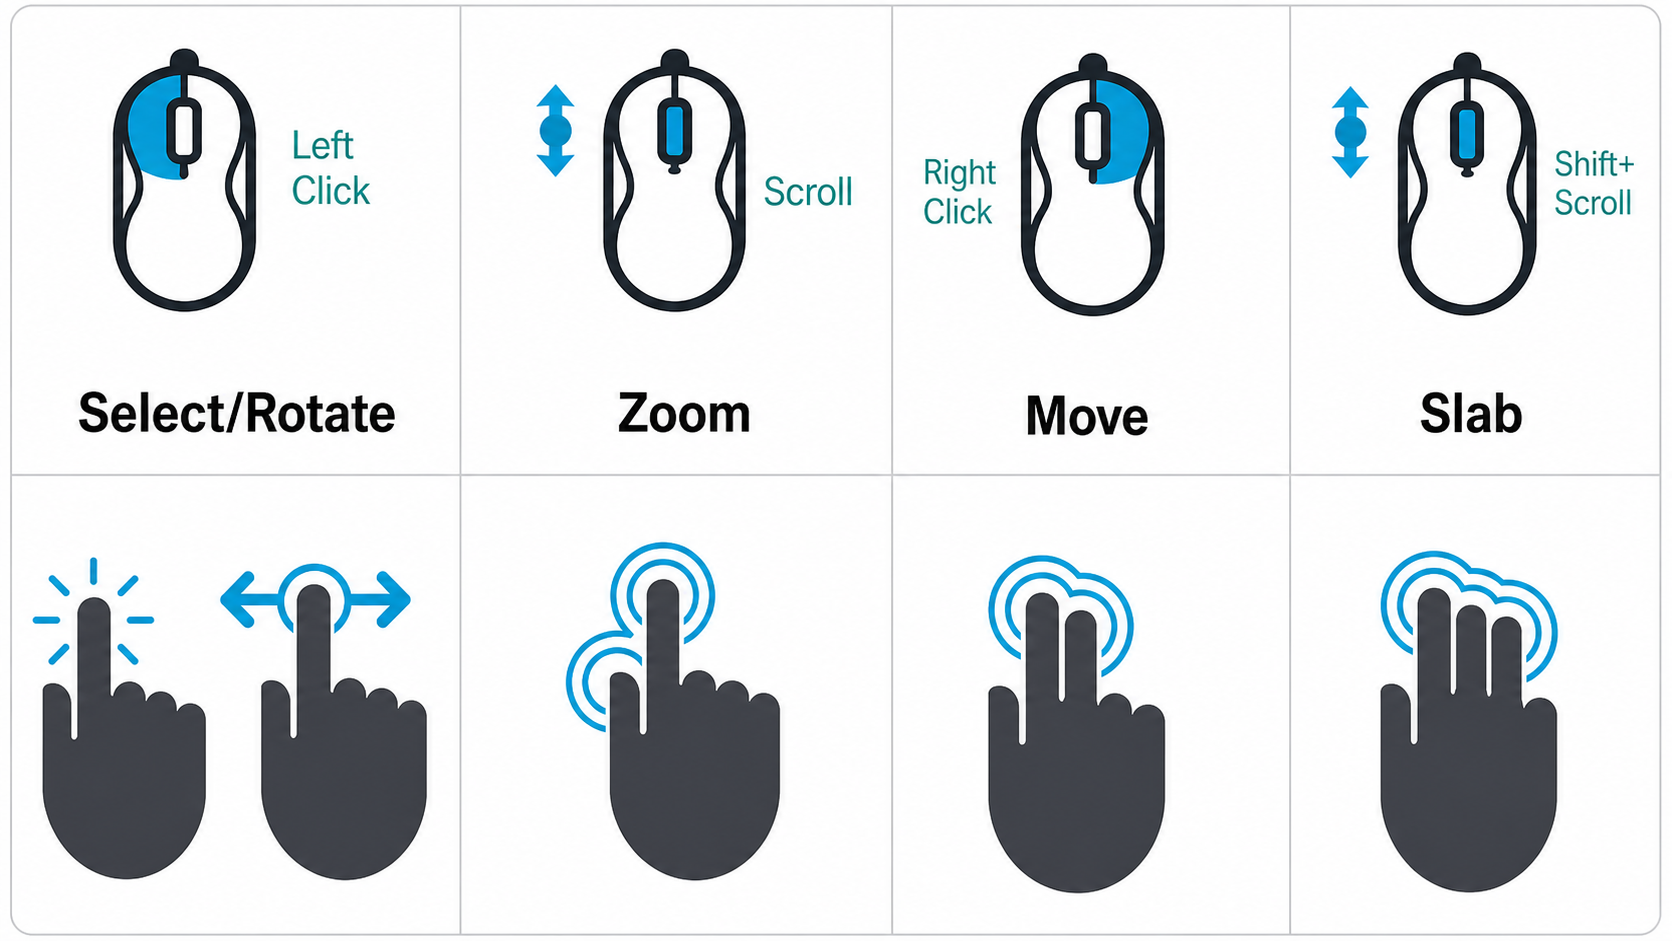
| Action | How to |
|---|---|
| Rotate | Left mouse button + drag, or Shift + left mouse button + drag |
| Zoom | Mouse wheel. On touchpad: two-finger drag. On touchscreen: pinch two fingers |
| Move | Right mouse button + drag, or Ctrl + left mouse button + drag. On touchscreen: two-finger drag |
| Center and zoom | Right mouse button click on the part of the structure you wish to see |
| Change clipping planes | Shift + mouse wheel. On touchpad: Shift + two-finger drag |
Toggle Menu
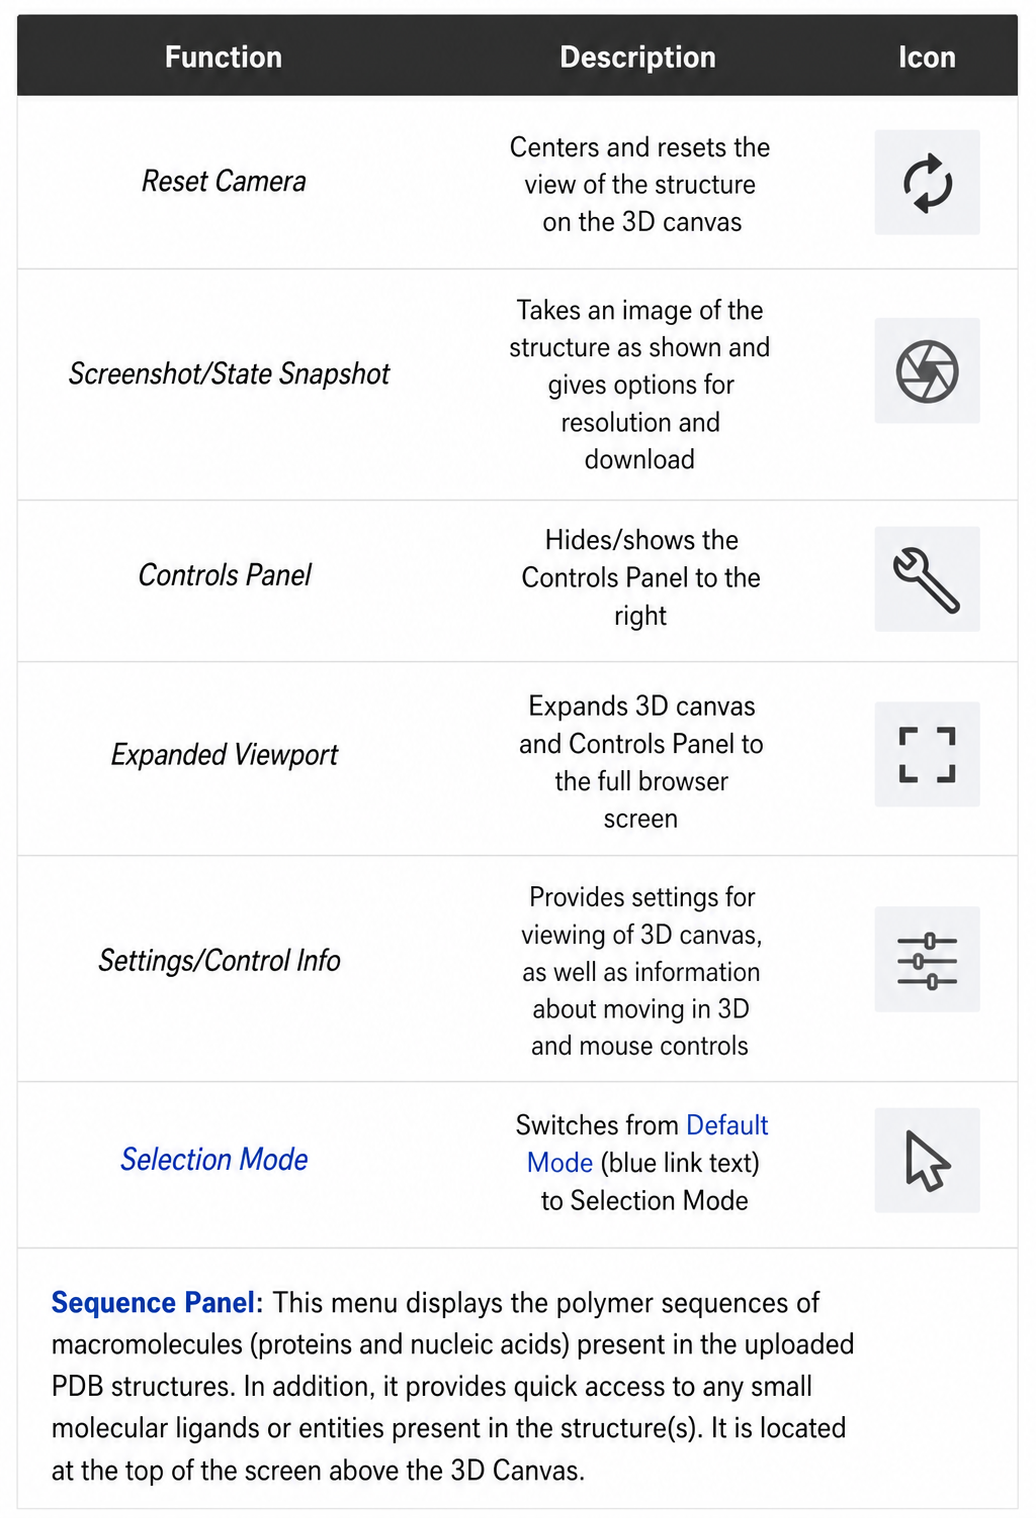
Mol* has two modes that change the behavior of a click. Switch between them using the Selection Mode icon (shaped like a cursor) in the Toggle Menu.
Default Mode: A click on a residue focuses on it. The focused residue and its surroundings are displayed in ball & stick representation with all local non-covalent interactions shown. Click again to hide surroundings.
Selection Mode: A click on a residue selects it. Selected parts appear with a bright green tint in the 3D canvas and Sequence Panel. Holding Shift while clicking extends the selection along the polymer from the last clicked residue.
How To...
Select
- Open Selection Mode (cursor symbol in Toggle Menu)
- Change the Picking Level if needed (residue/chain/etc)
- Then either:
- Click on objects in the 3D canvas, OR
- Click on residues in the Sequence Panel, OR
- Use the Set Operations Menu in the Selection Mode toolbar
See or Hide
Create a component of the region you wish to see/hide → go to the Components Panel and press the eye icon next to the component you created.
Color
Note
Components are located in the Control Panel. If you want to set coloring for separate entities, create a component for each entity.
| Color scheme | Path |
|---|---|
| N→C terminus (rainbow) | Components → Polymer → Set Coloring → Residue Property → Sequence Id |
| pLDDT | Components → Polymer → Set Coloring → Validation → pLDDT |
| Heteroatom | Components → Polymer → Set Coloring → Atom Property → Element Symbol |
| Secondary structure | Components → Polymer → Set Coloring → Residue Property → Secondary Structure |
| Hydrophobicity | Components → Polymer → Set Coloring → Residue Property → Hydrophobicity |
| Domain | Select domain → Selections Menu → Apply Theme to Selection → Color → Apply Theme |
Compare Structures
First, upload two or more structures at rcsb.org/3D-view.
- By chains — Select 2 or more polymer chains/residues → Superposition → By Chains → Superpose (RMSD-based or TM-align)
- By atoms — Select 1 or more atoms → Superposition → By Atoms → Superpose
Make Measurements
- Distance — Make 2+ selections → Measurements → Add → Distance
- Angle — Make 3+ selections → Measurements → Add → Angle
- Dihedral — Make 4+ selections → Measurements → Add → Dihedral
Upload Structures
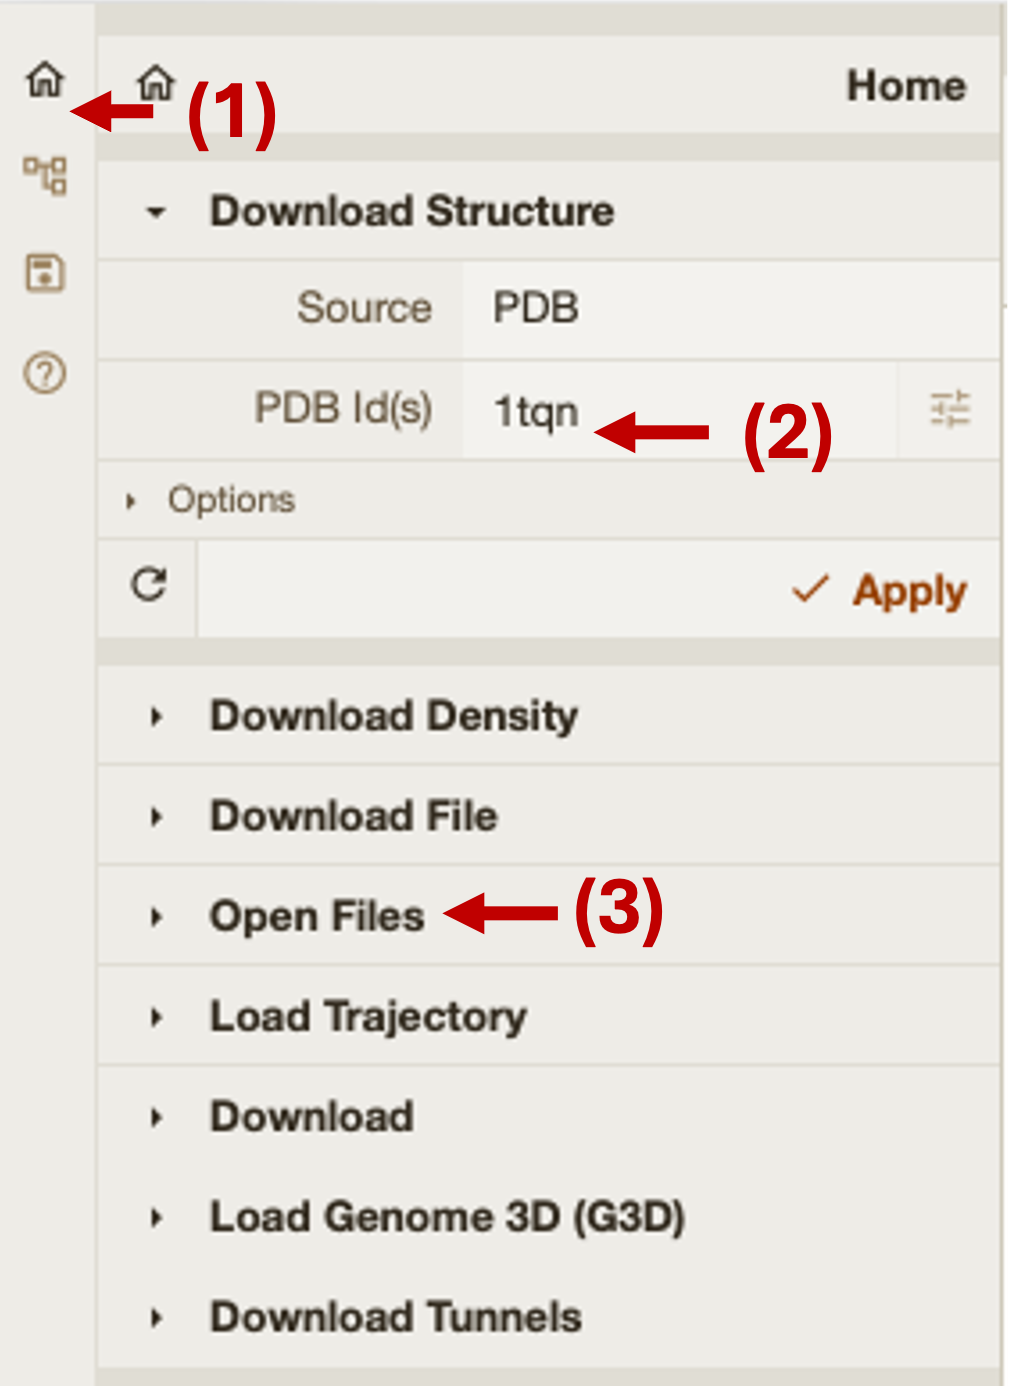
Go to the Home main menu. Options include:
- Download from PDB — paste a PDB ID
- Open Files — upload from your laptop
Exercise 1 (together)
Upload from PDB the crystal structure of human myoglobin (PDB ID: 1MBO) and hemoglobin (PDB ID: 4HHB).
Myoglobin is a monomer and hemoglobin is a tetramer. Select one chain of hemoglobin and one of myoglobin and superpose them using TM-align. Then hide all chains of hemoglobin that were not superposed with myoglobin.
Exercise 2
Upload the best model for the PIGU protein from Exercise 1 of the ColabFold tutorial to Mol and color it by pLDDT*.
PIGU protein (UniProt ID: Q9H490) is part of the human glycosylphosphatidylinositol (GPI) transamidase complex.
Download from PDB the structure of GPIT (PDB ID: 7W72) and superpose the modeled PIGU protein with PIGU in the complex.
- Analyze the TM-score and RMSD scores
- What can you say about the structural alignment?
- Hide all chains that were not superposed with PIGU